
Introduction
With being active in home automation for the last 5 years, I’ve by now (like most of you) automated all my lights and put temperature and humidity sensors on more places than strictly necessary. So, it only logical next step in my home automation journey is.. automating my curtains!
I quickly figured out that the off-the-shelf solutions are either expensive, need charging or simply don’t exist for curtain rods. So the only logical step is to go the DIY route!
Materials
An important part of this build is that the solutions should work with the Bekräfta curtain rod since that is what I already had installed at home. So, what you will need:
- IKEA Bekräfta curtain rod
- IKEA Betydlig wall bracket
- IKEA Syrlig curtain rings (to reduce the friction of the curtain)
- Curtains of your liking
- 12v, 5A power supply (to power the ESP and motors)
- LM2596S Step down converter (to power the ESP)
- 2x Nema 17 ~3–4 N. cm stepper motors (I tried with one, but that wasn’t powerful enough to perform at the speed I’d like)
- 1x ESP8266 such as the Wemos D1 Mini or NodeMCU
- 2x A4988 Stepper drivers
- 2x 100mF & 2x 10mF capacitator
- 2x GT2 16-tooth wheel bore (to use with the timing belt. I tried with a cable as well, but that would have insufficient grip)
- 5 meters timing belt
- 8x m3 bolts (to connect the stepper motor to the 3D print)
- 4x m5 bolts (to connect the stepper motor mount to the wall brackets)
- Cables to connect stepper motors (I used old network cables)
- Dupont cables
3D printer for:
- 1 timing belt clip,
- 2 stepper motor mounts
- 1 box for electronic
- 1 lid
All 3D parts can be found here and here.
Installing the hardware
Alright, so I’m going to assume that you already have working curtains that move — reasonably — smoothly. First, let’s connect the mount to the brackets.
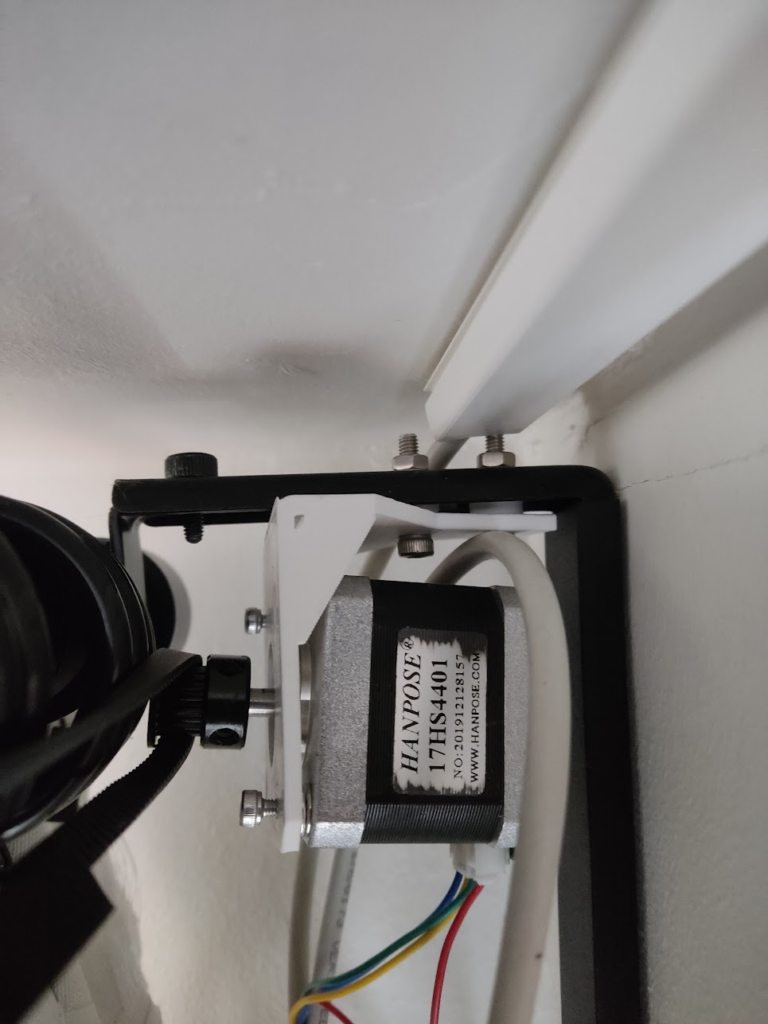
Next, let’s add the timing belt and the clip around the stepper motors
We’re getting there!
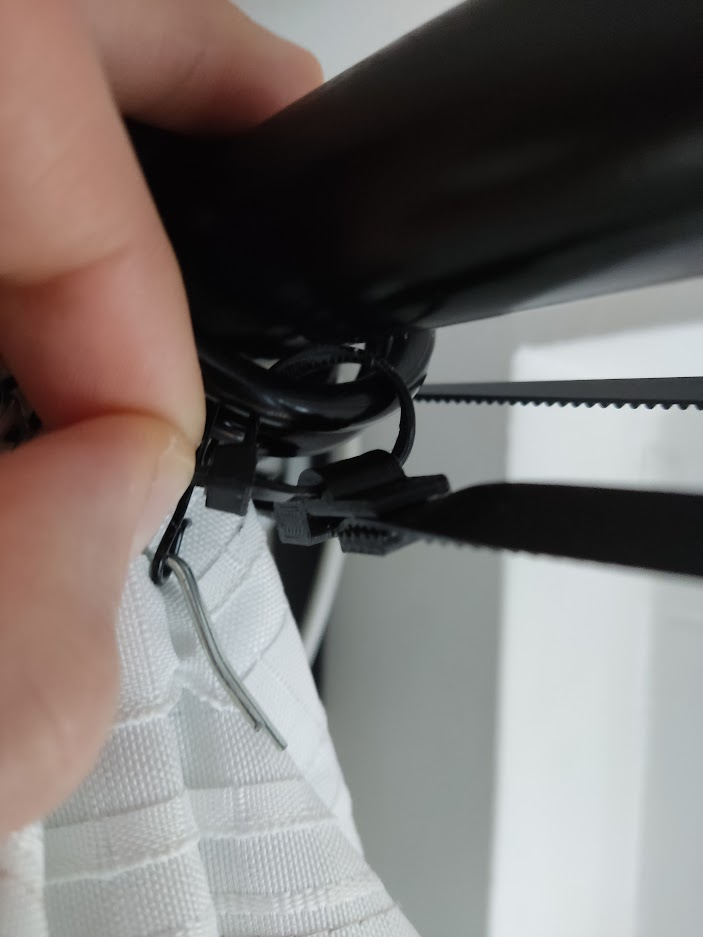
The next step is to connect the belt clip to the belt and the curtains. Below you can find a schematic of how it will open and close the curtains. To connect the clips, I recommend first completely opening the curtains and then connecting the left curtain on the top of the timing belt and the right curtain on the bottom of the timing belt.


Now that the stepper motors are in place, it is time to wire everything up and put it in the enclosure to ensure WAF.
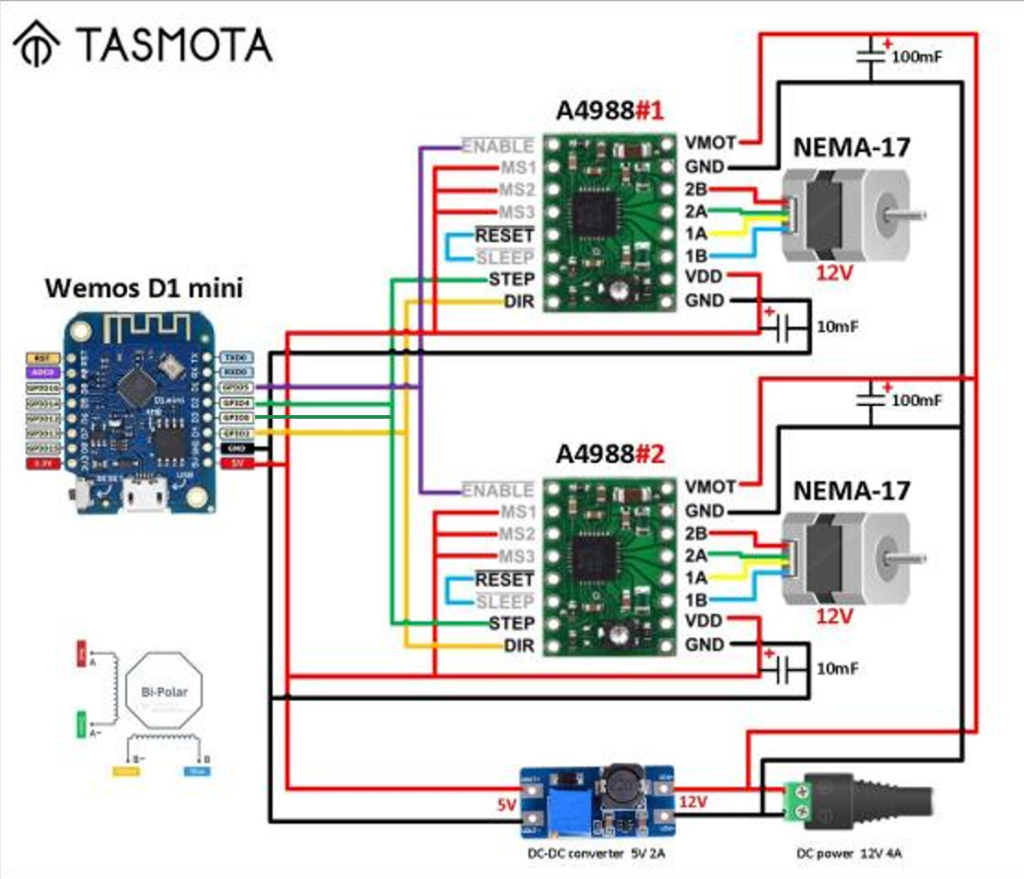
D1 > EN(ABLE) // Turns the steppers on/off before/after the operation
D2 > DIR(ECTION) // Sets the direction of the stepper
D3 > STEP // Does the actual turning of the stepper motor
D4 > STEP // Linking D3 back to D4 and STEP allows keeping track of the number of pulses that have been sent to the A4988 and thus telling the device what the current position is
Though this overview is pretty straightforward, there are some things to keep in mind:
- I didn’t use a stepper motor parallel board but split one cable into two
- Make sure to use high-quality connectors (I had some issues with one stepper not working due to this. Definitely hard to debug)

Setting up the software
To make the stepper motors spin, we will be using Tasmota. Though Tasmota is a peace of home automation software that can do a lot, I will focus on setting it up for only the blinds here.
Note: I also considered ESPHome, since I also use that a lot and personally find it a bit easier to configure. During testing, I found out that the speed and torque of the stepper motors were significantly lower, unfortunately, so I stuck with Tasmota.
Install Tasmota on ESP chip
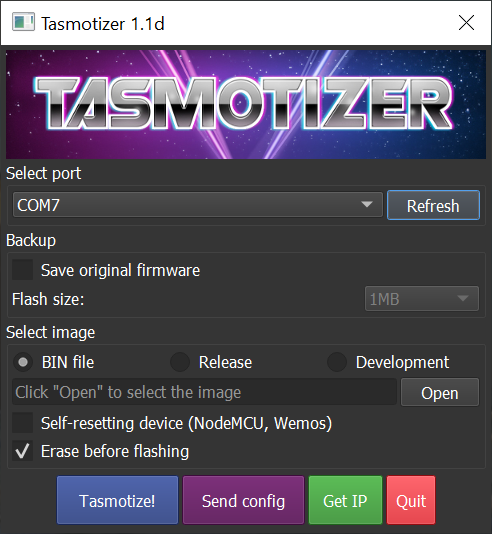
- Download Tasmotizer.
- Open Tasmotizer
- Click on the Refresh button
- Note down which COM ports are already shown
- Connect your ESP8266 via USB
- Click on refresh again and select the newly added COM device
- Under ‘Select image’ click Release
- Click Tasmotize!
- Wait until done
Setup wifi
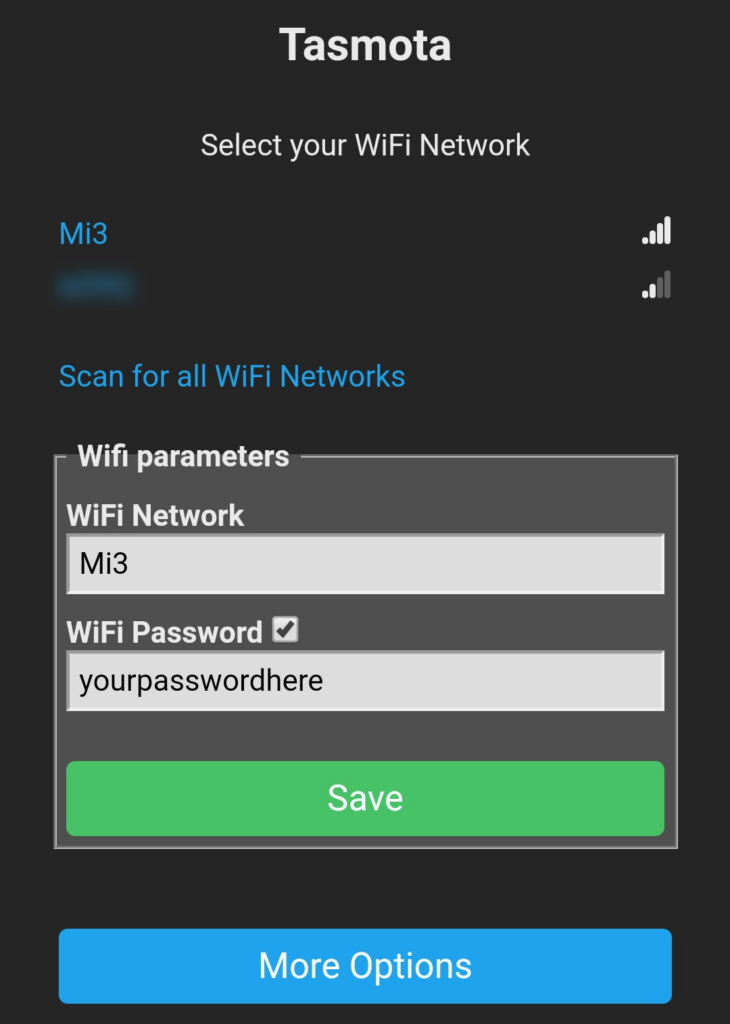
- Look for and connect to a wifi network called tasmota_XXXX
- Connect.
- A browser should open automatically. If not, go to http://192.168.4.1
- Fill in the Wifi SSID and Password.
- Save
- Connect to the same network and look up the IP-address
- You should be seeing the
Configuring Tasmota

Right, we’re getting there. Now it is time to configure the module so it knows which pins to use
- Go to Configuration > Configure Module
- Set Module Type to ‘Generic (0)’
- Save and wait until rebooted
- Go again to Configuration > Configure Module
- Set the following configuration:
D3 > PWM 1
D4 > Counter 1
D2 > Relay 2
D1 > Relay_i 1- Save and wait until rebooted
- Click on Console
- Enter the following commands in the console, tapping enter after every line (directly taken from the Tasmota documentation):
a) Set ShutterMode 4
Backlog PulseTime1 0; PulseTime2 0 // for relay Relay1i and Relay2
Interlock OFF // this is a global variable for all Relays or at least the RELAYS NOT in the Interlock group PWM1 and COUNTER1 defined
b) Enable Shutters
SetOption80 1 // this is a global variable for all Shuttersc) Configure Shutter 1 and test ShutterMode 1 is working
ShutterRelay1 1 // for relay Relay1i and Relay2d) Set the stepper motor speed (optional setting)
ShutterFrequency 1500 // this is a global variable for all steppers (1000rpm by default)e) Set at least a small ramp-up/ramp down period 1.0 second (optional)
ShutterMotorDelay1 1.0 // Stepper do not like infinite momentum. Ramp up/down speed allow much higher frequencies.f) Restart Tasmota
Restart 1Testing and doing shutter calibration
Now that we have everything wired up and the module configured, we should be able to control the steppers, nice! Let’s test them:
- Navigate to the console
- Enter ‘ShutterOpen1’ in the console (NB: Make sure to have the ShutterStop1 command ready since your motors will start spinning immediately! If it is the wrong way, they might get stuck)
- Enter ‘ShutterClose1’ to close them
- Optionally set ‘ShutterInvert1’ they are spinning the wrong way
- If your blinds are currently open, enter ‘ShutterSetOpen1’. If they are closed, enter ‘ShutterSetClose1’
- Set an initial number for the number of seconds it should take to open or close the current. Set these by entering ‘ShutterOpenDuration X’ and ‘ShutterCloseDuration X’
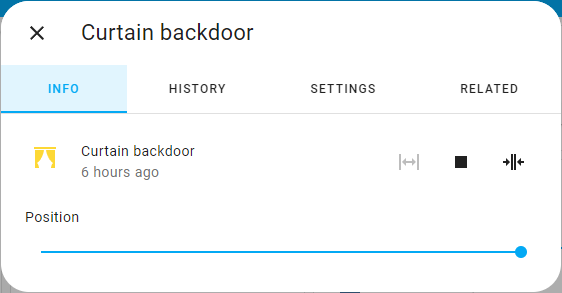
- Click on Main Menu and use the up and down arrow to try your setup
- Adjust the timings until you have something fully opens and closes the curtain
- Use the slider to set the curtain to 50% open
- Enter ‘ShutterSetHalfway1 50’ to also calibrate what 50% open is
Congratulations 🎉 !! You are now the official owner of a one-of-a-kind smart IKEA curtain that can be controlled while lying on the couch.
Optionally: connect with Home Assistant
Of course, an IoT curtain is fun, but what we really want is to be able to run some automation, so everything goes automagically. Some automations I have at home:
- Open/close the curtain at sunrise/sunset.
- Auto-close the curtain when the sun is shining bright to prevent the floor from discolouring.
- Auto-close the curtain when I lock the backdoor and the sun is below the horizon.
Home Assistant is one of the best (if not the best) tools out there for running these kinds of automations. If you haven’t heard of them yet, check them out here.
What do you need to connect the curtain to Home Assistant?
- Go to the Console
- Enter ‘SetOption19 0’
- Go to the Main Menu > Configuration > Configure MQTT
- Enter the following values:
- Host > IP address of your broker, most likely the same as Home Assistant
- Port > Don’t change
- Client > Don’t change
- User > Enter User of MQTT Broker
- Password > Enter Password user in MQTT Broker
- Topic > Don’t change
- Full Topic > Don’t change
- Click Save
- Go to Home Assistant > Integrations > + Add Integration
- Search for Tasmota and click on it (more details here)
- Your curtain should show up under the Tasmota integration ready to be used 💃🏻
Wrap-up
That is it! For me personally, this was one of the tougher projects to get right, since they are a lot of custom things. I hope that I have been able to help you get started with your own smart curtains or inspire a completely different approach.
Additional readings and acknowledgements
Since this project runs on loads of cool open-source projects I would definitely recommend checking out the documentation and showing some ❤️ to the people who created those.